
Solar Panels
I’ve been wanting solar panels on my RoadTrek for a while now. There were 3 ways I could recharge my batteries:
- Plug into shore power - this involves tethering yourself to the grid and sometimes paying for the privilege. Picking up and driving away becomes more complicated when you’ve got an electrical cable hanging off the side of your vehicle.
- Running the onboard gas generator - this uses gas (duh) and is generally loud and annoying. I run the generator as little as possible.
- Driving - the act of driving at highway speeds charges the batteries due to the excess energy created by the engine’s alternator. But sometimes I don’t need to drive anywhere but still need my batteries topped off.
Solar panels seemed like the ultimate solution: silent, always on, no consumable fuel, always working when the sun is out.
So I went in search of solar panels.
Hardware installations like this are not my forté and I just wanted a high quality product that I could have professionally installed and not have to worry about it. I’ll be honest, I didn’t do a ton of research. I understand that many people might want to install them on their own, but that’s not what I was looking for.
I had heard of a few brands of solar panels, but ultimately decided on going with AM Solar. They have a great reputation and focus specifically on RV-based solar systems.
I reached out to one of AMSolar’s recommended technicians: Lew Farber of Master Tech Energy Systems, Inc. and scheduled a consultation. Luckily I was only a few hours away from Naples, FL-where he resides during the winter. We met up to discuss my needs and what he might be able to help with.

The panels:
We would max out my roof with solar panels. 3 panels with a total of 370 watts!
Here’s a breakdown of the system Lew put together for me:
- SunRunner Signature 25MPPT/6/PRO Core
- 2x GS135 Solar Panels
- 1x GS100 Solar Panel
- Combiner box & other misc parts and accessories.
We scheduled the apointment for install at his facility in Napes on March 30th.
Installation Day 1
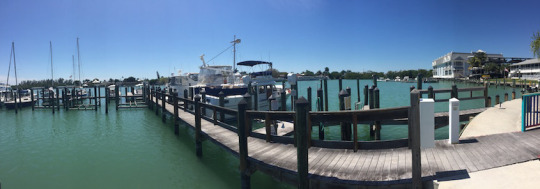
I arrived around 10am on the scheduled date and pulled my RoadTrek into Lew’s installation bay at a local marina. The views were amazing and I couldn’t have asked for a more beautiful place to spend the next two days. There was also a decent outdoor restaurant and bar within about 100 feet (no kidding, it was right there!) so I’d have a place to eat and hang out in the evenings.
I immediately saw my new solar panels standing against a table and I was giddy with excitement!

Lew got to work and I hopped on my laptop and started programming… but I took breaks every once in a while to check on the progress and take photos.
The first panel is placed:

All three placed on the roof:

A view from the side:


No holes were drilled in the roof for the mounting hardware. The brackets were bonded to the roof with some high tech goop that Lew promised me would be near impossible to remove and had no chance of coming loose without extreme human intervention.
It’s a good thing I don’t drive faster than 65mph!

The interior of my van was completely disassembled so the wires could be run through the single hole in the roof.

After the wires were run, we put things back together and I was able to spend the night parked right there at the marina.

Installation Day 2
With all of the exterior components installed, day 2 was dedicated to wiring, electrical work, and interior hardware installation.
The first thing that went in was the charge controller remote. This cool device can do way more than I need it to do, but at a minimum, it displays:
- Battery percentage
- Current battery voltage
- Current amp hour draw / charge
- Amp hours from full batteries
- Solar power input & output!
Lew rearranged my batteries and put brackets into the floor to make sure they didn’t move.


Heres the charge controller. It’s the “brains” behind the solar system and installed near all the other electrical doo-dads under my bed.

The Final Product
I’m extremely pleased at Lew’s quality & speed of work, professionalism, and attention to detail. He wanted to get everything just right and in the end, the final product definitely delivered.
Here’s a top-down view of the final wiring. All nice and neat and organized!

I’m now enjoying living off the grid when it comes to my electricity! I wake up in the morning and check the battery levels… usually between 60-80%. On a sunny day, my batteries are fully charged by 10am or so, and on cloudy days it takes a bit longer but the batteries are always fully charged by the end of the afternoon.
I’m thrilled with my new solar system!
Final cost/benefit analysis
(I am an engineer, after all)
Having spent the past 2 weeks at Skydive City, I’ve saved $15/night since I didn’t have to plug into electricity hookups. That’s $210 saved already!
With a total cost of roughly $3,700 (parts, and labor), I’ve got a breakeven point of less than 1 year - 247 days! But factor in the 30% tax rebate for solar improvements to your home (yes, RVs count as a home!), the total cost comes down to roughly $2,590 and the breakeven point is reduced to 173 days!
What a fantastic investment!
From the side, unless you know what you’re looking at, you can barely tell that the solar panels are there.

Leave a Comment